How do PrusaSlicer supports handle overhangs?
PrusaSlicer decides where supports go in two steps: first whether support material is switched on, then which surfaces receive supports. Once it is on, automatic overhang detection and manually placed support enforcers are the two mechanisms that generate supports, and automatic generation can be turned off while enforcers keep working.
Global switch and per-object override
Support material is enabled in Print Settings > Support material, which sets the default for the whole project. When only one part of a plate needs support, you can right-click that model and enable supports for that object alone. Other objects keep the global setting, so a single print can combine supported and unsupported models without changing the profile.
Automatic detection and support enforcers
Auto-generated supports drive overhang detection, which lets the slicer find unsupported overhangs and place supports under them. Turning off auto-generated supports disables this detection entirely. In that state, the slicer no longer searches for overhangs on its own, and only support enforcers generate supports, so supports appear only where you have placed enforcers.
According to Prusa Research (Prusa Knowledge Base, 2026), this is the only way to get supports from enforcers alone. The table below summarises the three possible configurations.
| Setup | Where supports appear |
|---|---|
| Support material off (default) | Nowhere, unless enabled per object |
| Support material on, auto-generated supports on | Overhangs found by the slicer, plus enforced areas |
| Support material on, auto-generated supports off | Only in areas covered by support enforcers |
Using enforcers without auto-generation gives precise control, but it also means the slicer will not warn you about overhangs you have not covered. Check each model’s overhangs in the preview before slicing, and place enforcers under any feature that needs support.
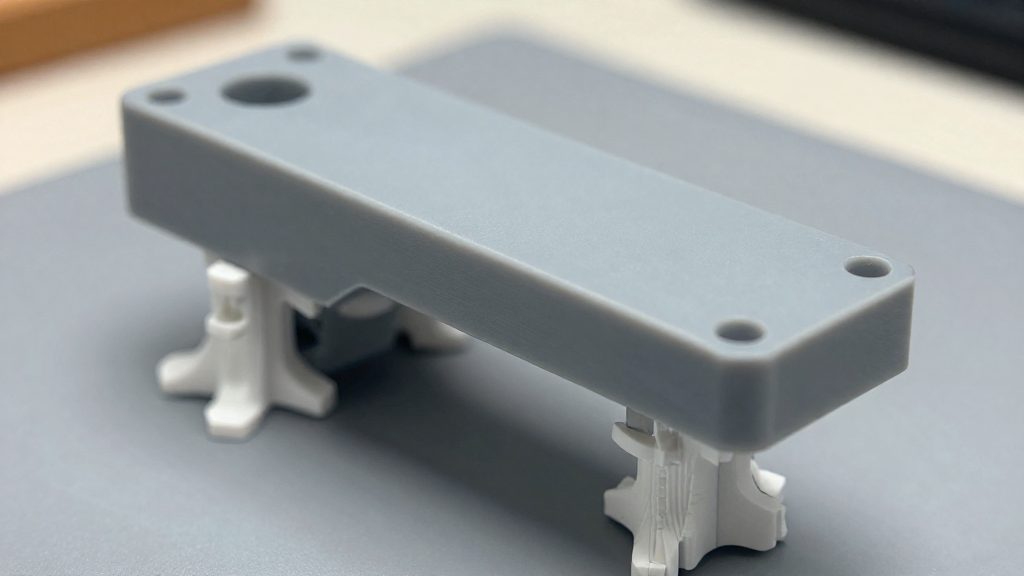
Where to find the support settings
PrusaSlicer has two levels of support control: a global setting that applies to the whole plate and a per-object override. Supports are off by default, so you must enable them before any support geometry is generated. According to Prusa Research (Prusa Knowledge Base, 2026), supports stay off unless you turn them on in Print Settings > Support material, or override them for a single model.
Global settings: Print Settings > Support material
Open the Print Settings tab and select Support material. This page defines the support behaviour for every object on the plate. The same page contains the Style dropdown, which chooses the support structure type.
Use the global page when all parts on the plate need the same support behaviour, or when you are setting up a profile you will reuse.
Per-object override: right-click the model
Right-click a model to apply support settings to that object alone. This right-click override lets you leave supports off for the rest of the plate while enabling them for one part that has overhangs, or the reverse. Changing the global setting instead would affect every object, so the override is the more targeted option when only one model needs supports.
The Style dropdown
Inside the Support material page, the Style dropdown offers three options. Grid is the default. The trade-offs are:
| Style | Structure | Trade-off |
|---|---|---|
| Grid | Boxy pillars (default) | More stable for thin overhangs, but uses more time and material |
| Snug | Follows the overhang’s shape and does not leak to walls | Saves filament and can be slightly easier to remove; tall, thin pillars and small features such as chins may be less stable |
| Organic | Grows branches | Branches are easy to remove |
Overhang threshold explained
The overhang threshold sets the most horizontal slope that PrusaSlicer will print without support. According to Prusa Research (Prusa Knowledge Base, 2026), the angle is measured from horizontal, not from vertical, so the value describes how far a surface tilts away from a flat plane. The slicer uses this value to decide which downward-facing areas of a model need supporting structures during slicing.
How the angle is measured
The horizontal plane is the reference for every value on the scale. A flat surface lies at the base of the measurement, and a surface that rises straight up is measured against that same reference. Because of this, the largest value on the scale, 90, is a vertical surface, such as a straight wall. A surface at a shallow angle sits near the low end of the scale, and a surface close to 90 is almost upright.
Reading the scale this way explains why the threshold works as a cutoff. Each overhang on a model has its own slope, and the slicer compares that slope with the threshold you set.
What the threshold does to each surface
Every downward-facing surface falls on one side of the threshold. The table below shows how PrusaSlicer treats each case.
| Surface slope compared with threshold | Result during slicing |
|---|---|
| Shallower than the threshold (closer to horizontal) | Flagged as an overhang that needs support |
| At or steeper than the threshold (closer to vertical) | Printable without support |
Raising the threshold makes the slicer add supports to steeper slopes too, so support increases. Lowering it reduces support, because fewer surfaces fall into the shallower band that receives supports.
Grid, Snug or Organic: which style?
PrusaSlicer offers three support styles, selected under Print settings > Support material > Style. Grid is the default. The right choice depends on how much stability the overhang needs compared with how much filament and removal effort you can accept.
Grid: the stable default
Grid supports are boxy pillars that fill the space under an overhang. According to Obico (2026), they are more stable for thin overhangs than the other styles. The trade-off is time and material: Grid uses more of both. If a thin, unsupported edge sags or droops during printing, Grid is the first style to try.
Snug: shape-following supports
Snug supports follow the shape of the overhang and do not leak onto the walls of the model, which keeps the support contained to the area that needs it. Obico (2026) reports that Snug saves filament and can be slightly easier to remove than Grid. The limitation is stability. Tall, thin pillars may be less stable, and small features such as chins may receive weaker support.
Organic: branches that come off easily
Organic supports grow tree-like branches that touch the model at selected points rather than filling the area beneath it. Prusa Research (2026) describes them as easy to remove after printing. Their behaviour can be adjusted with several parameters: branch angles, branch diameter, double walls, tip diameter, branch distance and branch density. Organic supports suit parts where the contact surface must stay small and clean, and where removal time matters more than maximum rigidity.
Contact Z distance for easier removal
The top contact Z distance is the vertical gap between the object and the support interface, the layer where the support meets the part. Prusa Research (Prusa Knowledge Base, 2026) suggests a gap of about 50–75% of the layer height, which can be written as 0.5 × layer height to 0.75 × layer height. A small gap keeps the interface from bonding flush to the underside of the overhang, which is what makes the support easier to break away.
The gap also controls two first-layer settings on the support. The table below shows how the value changes them.
| Top contact Z distance | Effect on the support’s first layer |
|---|---|
| Above 0 (suggested 50–75% of layer height) | Bridge flow and first-layer speed can be applied |
| 0 | Bridge flow and first-layer speed are disabled |
The value 0 is also required if you enable Synchronize with object layers. If you use that option, you give up the first-layer bridge flow and speed settings, so the choice between the two depends on which behaviour you need.
To change the gap, open Print Settings, go to Support material, and edit the top contact Z distance. Set it to a value above 0 when you want the support’s first-layer bridge flow and speed to apply.
How do you paint supports on or off?
The Paint-on supports tool in PrusaSlicer lets you control supports on individual surfaces of a model, instead of relying only on the global settings. Painting can force supports onto areas you choose or block them from areas where you don’t want them. According to Prusa Research (Prusa Knowledge Base, 2026), this tool works on both standard and organic supports.
Forcing supports onto a surface
Painting an area as an enforcer tells the slicer to generate supports there, even where the overhang would otherwise print without them. This is useful for a specific overhang that the automatic detection does not cover, or for an area where you want support regardless of its angle.
Blocking supports from a surface
Painting a blocker does the opposite: the slicer generates no supports on the painted area. Use it on overhangs that a support would damage or that you want to leave free of support material, while the rest of the model keeps its support configuration.
Using the tool with organic supports
Organic supports are selected under Print settings > Support material > Style. Their branches can be manually enforced or blocked with the same paint-on tool, so you can direct where branches grow without changing the support style for the whole print.
Common support problems and fixes
Most support defects come from three causes: the support style does not suit the geometry, the gap between support and part is wrong, or the removal method damages the surface.
Thin, tall Snug pillars wobble or collapse
According to Prusa Research (2026), tall, thin Snug pillars may be less stable.
Switch the object to Grid, which is more stable for thin overhangs, or add support enforcers under the affected feature. Grid uses more time and material.
Supports fused too tightly to printed surfaces
When support removal tears the surface or leaves material bonded to the part, the gap between the interface and the object is too small. The Top contact Z distance controls this gap.
Scars and blobs left after removal
Surface marks usually appear where the support touches the part, so the support style determines how many contact points the model receives. Organic supports grow branches designed to come away cleanly.
As general practice, rather than sourced guidance, let the print cool before removing supports. Clip the contact points with flush cutters and wear eye protection, because plastic fragments can fly off. Lightly sand any residue.
Frequently asked questions
What does the PrusaSlicer overhang threshold actually measure?
The overhang threshold is the most horizontal slope, measured from horizontal (where 90 is vertical), that PrusaSlicer prints without support. Surfaces shallower than that angle receive supports, so raising the value adds supports to more surfaces and lowering it reduces them.
My tall, thin Snug pillars wobble. What should I change?
According to Prusa Research (Prusa Knowledge Base, 2026), tall, thin Snug pillars may be less stable. Switching the style to Grid gives boxy pillars that Obico (2026) describes as more stable for thin overhangs, at the cost of more time and material.
How far should the top contact Z distance be set?
Prusa Research (Prusa Knowledge Base, 2026) suggests a top contact Z distance of about 50–75% of the layer height. Setting it to 0 disables bridge flow and speed for the first layer, and it is required for “Synchronize with object layers”.