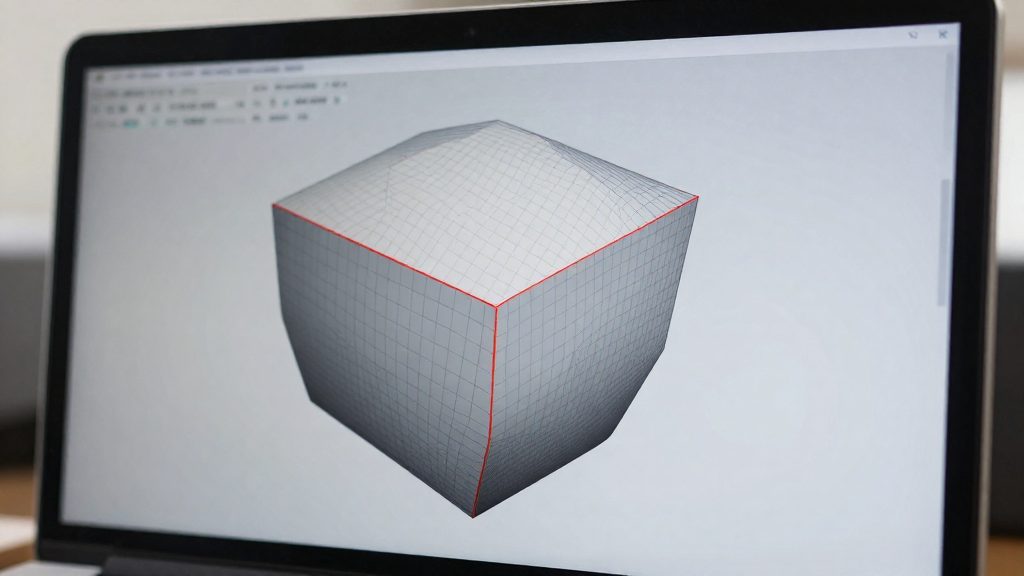
A mesh is non-manifold when its geometry breaks in a way that makes it unclear which side of the surface is inside and which is outside. The most common example is a hole in the shell. An STL file stores an object only as a collection of triangles, with no other description of the solid, so the software has to infer the volume from the surface alone. According to 3DPrinterly (2023), such a mesh may not be printable.
What does non-manifold mean in an STL?
A closed shell is a surface with no gaps, in which the faces together enclose a volume. In that case the slicer can separate material from empty space, and the inside and outside of the object are unambiguous. The definition concerns the topology of the surface, not its appearance, so a file can look complete in a viewer and still fail the test.
Holes blur this boundary. When part of the surface is missing, the mesh no longer encloses a volume, and the software cannot determine where the solid ends. A hole is therefore the typical symptom, because it removes the surface that should separate inside from outside.
The break often sits at the level of non-manifold edges and vertices, the points where the surface topology is inconsistent. In a solid model, each edge should join exactly two faces. An edge that touches three or more faces, such as a T-junction, is non-manifold. So is an internal face left inside the solid, which should be deleted (SimplyPrint, 2025). Non-manifold geometry can also sit at vertices, the corner points where edges meet.
When you open an STL, check for three patterns: a hole in the shell, an edge shared by three or more faces, or an internal face inside the solid. Any one of them means the mesh does not describe a clear inside and outside.
Why do non-manifold errors break slicing?
A slicer builds each layer by deciding which areas are solid material and which are empty, and it depends on the mesh having a clear inside and outside. A mesh is non-manifold when geometry problems leave that boundary unclear, such as a hole in the shell, and such a mesh may not be printable. When the slicer cannot reliably tell which regions to fill, the output can show gaps in walls, missing infill, or contours that overlap other geometry.
The underlying rule is about how faces meet. In a solid model, each edge should join exactly two faces. A non-manifold edge touches three or more faces, which typically happens at a T-junction or where an internal face remains inside the body. At that edge, the slicer has no unambiguous way to close the outline of the layer, so it may skip a section or draw a contour that crosses another part of the model.
Spotting the damage in Cura’s Layers view
The LulzBot guide, as reported by DigiKey Maker.io (2023), says that a shell with holes is non-manifold and can make Cura slice inaccurately. To check a sliced model, open the Layers view and move the layer slider through the part. Look for layers where a section is missing or where a contour intersects other geometry. A slice that looks complete from the outside can still contain these faults.
Fixing the faults at the source
Non-manifold edges are usually fixed by deleting the extra or internal faces. If holes remain after an automatic repair, they can be filled by hand in modeling software such as Blender. If the file is too damaged to repair, the guide recommends redesigning the model.
How do I find non-manifold edges?
A mesh is non-manifold when its geometry makes the inside and outside of the model unclear, for example because the shell has a hole. A non-manifold mesh may not be printable. You need to locate the affected edges and vertices before choosing a repair method, and two checks in the niche help with this: Blender’s Edit Mode selection and the Manifold indicator in Slic3r.
Selecting faults in Blender
Open the model in Blender and switch to Edit Mode. Run Select Non-Manifold, which selects the non-manifold edges and vertices so the problem areas are highlighted on the mesh. Record where each highlighted group sits, because the selection is the only map of the faults you have at this stage.
Reading the Manifold indicator in Slic3r
The bottom-right panel of Slic3r shows a Manifold indicator for the loaded file. It shows the manifold status of the loaded file. To locate the affected edges, use Select Non-Manifold in Blender.
Identifying which edges and vertices are affected
In a solid model, each edge should join exactly two faces. An edge that touches three or more faces is non-manifold, and according to SimplyPrint (2025), the typical cases are a T-junction or an internal face.
| Faces meeting at the edge | Status |
|---|---|
| Two | Expected in a solid model |
| Three or more | Non-manifold: T-junction or internal face |
To classify a highlighted edge, count the faces that meet it. A T-junction is where one face ends on the middle of another face’s edge. An internal face is a surface sitting inside the solid. The same Blender selection also returns non-manifold vertices, so inspect the corners of each highlighted patch as well as its edges.
Automatic repair tools
Automatic repair tools can close small gaps in a non-manifold STL quickly, but each one has a different starting point and a different limit. A mesh is non-manifold when inside and outside are unclear, for example because of a hole in the shell, and such a mesh may not be printable. The three tools below are the most direct options for consumer printing workflows.
Meshmixer: Auto Repair All and Erase and Fill
In Meshmixer, the global option is at Analysis > Inspector > Auto Repair All, which processes the whole model. For a localised fix, the Erase and Fill option works on a selected boundary around a problem area, so the repair touches only the damaged zone. According to 3DPrinterly (2023-11-13), these are the two repair routes Meshmixer offers for this purpose.
Windows 3D Builder: repair on opening
Windows 3D Builder can auto-repair an STL as soon as you open it. Once the repair is applied, save the file and re-import the saved copy into your slicer. Slice the saved version rather than the original download, because the repair only exists in the saved file.
Slic3r: File > Repair STL file and the Manifold check
In Slic3r, File > Repair STL file… runs an automatic repair. The DigiKey Maker.io (LulzBot content) guide (2023-11-22) describes this repair as effective but not perfect, so the result must be checked. After repairing, re-add the file and look at the Manifold indicator in the bottom-right panel. It should read ‘Yes’.
If holes remain after automatic repair, the same guide advises fixing them by hand in modeling software such as Blender, or redesigning the model if the file is too damaged. A model that passes the Manifold check can still slice incorrectly, which is why a final check in the slicer’s preview remains necessary.
Fix it manually in Blender
Once the non-manifold geometry is selected in Edit Mode, cleanup is manual. According to SimplyPrint (2025), a non-manifold edge touches three or more faces, such as at a T-junction or an internal face, whereas in a solid model each edge should join exactly two faces. The fix is to delete the extra or internal faces so that every edge is shared by exactly two.
Cleaning the selected edges
Work through the highlighted edges one area at a time rather than deleting everything at once:
- Identify the extra face. Look for faces sitting inside the shell or attached to the side of another face at a T-junction.
- Switch to face selection (press 3) and click the extra faces, then press X and choose Faces to delete them.
- Recheck the selection. Deleting faces can open a gap, so the non-manifold selection may change. Note any new holes before moving on.
Deleting an internal face is usually the cleanest fix, because it removes geometry that the slicer would otherwise read as an ambiguous surface.
| Problem found | Manual action |
|---|---|
| Extra or internal face | Delete the face |
| Hole left after automatic repair | Fill the hole by hand |
| Model too damaged to edit | Redesign the model |
Filling the remaining holes
If holes remain after an automatic repair, close them by hand:
- In Edit Mode, switch to edge selection (press 2).
- Select the open boundary of the hole. For a single-loop gap, Alt + click one boundary edge selects the whole loop. Otherwise, use Select > Select Loops > Select Boundary Loop.
- Press F to create faces across the boundary.
- Run Select Non-Manifold again. An empty selection shows the hole is closed. Then check the normals and the slice preview before printing, because this one check does not prove the file is clean.
Export the corrected STL and reopen it in your slicer. In Slic3r, the bottom-right panel’s Manifold indicator should read “Yes” after repair, as DigiKey Maker.io (2023) describes for its LulzBot content.
Reversed normals and leftover holes
A mesh can pass an automatic repair and still slice incorrectly. Two faults can survive an automatic repair: faces whose reversed normals point inward, and holes the repair tool did not close. Both make the slicer misjudge what is inside the shell, so check for them before printing.
Reversed normals are the first suspect when a model that looks closed produces a wrong slice. In Blender, Mesh > Normals > Recalculate Outside corrects inward-facing faces. According to 3DPrinterly (2023), this recalculates the normals so they point outward, and it is the step to run before re-checking the slice preview.
Holes can remain after automatic repair, so the result needs to be checked rather than assumed. Meshmixer’s Analysis > Inspector > Auto Repair All, Windows 3D Builder’s repair on open, and Slic3r’s File > Repair STL file… are all automatic. Slic3r describes its repair as effective but not perfect, so a clean result does not prove the shell is closed.
The table below lists where each slicer or editor shows the state of the mesh.
| Tool | Where to look | What it reveals |
|---|---|---|
| Slic3r | Manifold indicator, bottom-right panel | Shows ‘Yes’ only when the mesh is manifold |
| Cura | Layers view | Missing sections or geometry intersecting other parts |
| Blender | Edit Mode > Select Non-Manifold | Highlights non-manifold edges and vertices |
A model that is manifold but still slices wrongly may have reversed normals, so check orientation before reworking the geometry. Each edge of a solid should join exactly two faces. An edge touching three or more faces, such as a T-junction, or an internal face inside the shell indicates a mesh that is not clean even when it looks watertight. If the file is too damaged to repair, the recommended course is to redesign the model rather than patch it.
When should you remodel instead?
Remodelling is the right route when a repair tool cannot recover the shell. According to DigiKey Maker.io (2023), if a file is still damaged after automatic repair, the model should be redesigned rather than patched. A non-manifold mesh has unclear inside and outside, such as a hole in the shell, and may not be printable at all. Use the checks below to judge how damaged the file is.
Start by running the automatic repair and reading the result. In Slic3r, use File > Repair STL file…, then re-add the file and confirm that the Manifold indicator in the bottom-right panel shows ‘Yes’. The repair is effective but not perfect, so a ‘No’ after repair means you need to choose between editing and rebuilding.
| Result after automatic repair | Next step |
|---|---|
| Manifold shows ‘Yes’ | Check the slice preview and the normals, then slice if no missing or intersecting sections appear |
| Holes or extra faces remain | Fix them by hand in modeling software such as Blender |
| Shell too damaged to recover | Redesign the model |
Hand editing is practical when the remaining problem is a hole or a few faces. Each edge in a solid model should join exactly two faces. An edge touching three or more faces, such as a T-junction or an internal face, is the cue to delete the extra faces (SimplyPrint, 2025).
When you redesign, rebuild the part in modeling software and export a new STL. Then verify it the same way: Manifold must read ‘Yes’ in Slic3r, and Cura’s Layers view should show no missing sections or intersecting geometry.
Frequently asked questions
Does a mesh that Slic3r reports as manifold always slice correctly?
Not always. A manifold mesh can still slice wrongly if its normals are reversed, which means the faces point toward the inside of the object. To check, open the file in Blender and run Mesh > Normals > Recalculate Outside.
What should I do if automatic repair leaves holes in the model?
Fix the remaining holes by hand in modeling software such as Blender, where Select Non-Manifold in Edit Mode highlights the faulty edges and vertices. If the file is too damaged to salvage this way, the source recommends redesigning the model instead.
Which built-in repair tools should I try before editing by hand?
Slic3r’s File > Repair STL file… runs an automatic repair, and Meshmixer’s Analysis > Inspector > Auto Repair All does the same job. On Windows, 3D Builder can auto-repair a file when you open it, after which you save it and re-import it into your slicer.