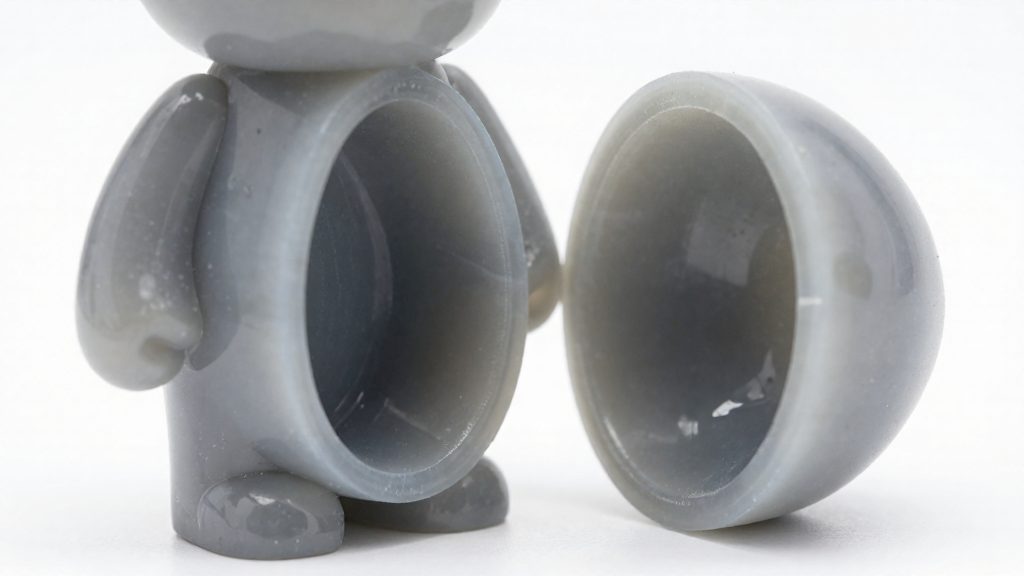
Hollowing a model removes its solid interior volume and leaves only an outer wall and an empty cavity. Resin consumption follows the volume the printer has to cure, so an interior replaced by air is resin the printer never has to use. Hollowing is the main way to reduce resin use, and the other steps (wall thickness, drain holes, cup checks, cleaning) make it work in practice.
Why hollow a resin print
A solid model is a full block of cured resin from the build platform to the top surface. When the interior is removed, the printer cures only the outer shell, the layers that define the geometry and the surface detail. The cavity contributes no resin, so the printed volume drops to the shell alone.
What stays and what disappears
A hollow part keeps two things:
- An outer shell that carries the shape, surface detail and wall strength.
- An empty interior that is not cured at all during printing.
Everything between the shell and the centre is removed from the model in the hollowing step, before slicing. The printer therefore spends time and resin on the walls only, and the finished part weighs less than the solid version of the same model.
Why the savings depend on the model
Because resin use scales with printed volume, the amount saved depends on how much solid material the model contains. A part with a large solid core loses a lot of volume when hollowed, while a model that is already thin-walled has less interior to remove. Formlabs (2026) states that actual savings depend on the model and the settings, so the same hollowing workflow will not produce identical results on every part.
What the cavity changes inside the part
The empty interior creates a practical problem that solid prints do not have. Uncured resin that enters the cavity has nowhere to go. Formlabs (2026) notes that drain holes are needed to release this resin. Without them, the cavity stays sealed, and the cleaning step cannot rinse it.
How much resin can hollowing save?
The worked example in the Formlabs guide shows a 77% reduction. According to Formlabs (2026), the test used a Form 4 printer with White Resin V5, a 2 mm wall and 0.1 mm layers.
| Setting | Formlabs example |
|---|---|
| Printer | Form 4 |
| Resin | White Resin V5 |
| Wall thickness | 2 mm |
| Layer height | 0.1 mm |
| Resin use before hollowing | 228.90 mL |
| Resin use after hollowing | 51.88 mL |
| Reduction | 77% |
The difference between the two volumes is 177.02 mL of resin per part in that test.
Why the savings vary
Formlabs states that actual savings depend on the specific model and print settings, so the 77% figure is one data point rather than a default. The result depends on how much solid volume the model contains before hollowing, which is why a part with a different shape will not produce the same percentage. Wall thickness affects how much material remains around the cavity, so a wall other than the 2 mm used in the example will change the saving.
Do not assume the Form 4 and White Resin V5 result applies to other printer and resin combinations.
Choosing wall thickness
Wall thickness is the main setting that decides both how much resin a hollowed model saves and how well it holds up afterward. According to Formlabs (2026), wall thickness determines the strength of a hollow print. A thicker shell keeps more material around the cavity, while a thinner shell removes more resin from the build.
Why thin walls become a structural risk
A hollow print has no internal support structure. A solid model carries its load through material throughout its volume. A hollowed model relies on its outer shell alone to keep its shape. When that shell is thin, the part has less material to resist deformation, so large models become fragile. The problem grows with size, because a bigger hollow part has a larger shell with fewer internal features to brace it.
Using thinner walls to save resin
Thinner walls use less resin, which is the reason for hollowing in the first place. The saving depends on the shell thickness and on the size of the model, so a thin wall that works on a small part may not be suitable for a large one. A practical approach is to decide the wall thickness per model:
- Small, lightly handled parts: thinner walls keep the resin saving high while the part stays small enough to hold its shape.
- Large parts: thicker walls protect the structural integrity of the shell, at the cost of less resin saved.
- Any model: check the wall thickness in the slicer preview before printing, so that the shell you designed is the one that prints.
Judge the minimum safe wall thickness for each part by its size and handling.
Where should drain holes go?
Every hollowed part needs at least two drain holes. Without them, uncured resin stays trapped inside the shell, so the interior never fully empties. Formlabs (2026) sets a clear placement rule: one hole as close to the build platform as possible, and at least one more on a surface you choose.
Placing the hole near the build platform
Set the model’s orientation on the build platform before you place any holes, because the first opening depends on which part of the shell sits lowest. Position that hole as close to the platform as possible, on the bottom surface of the part. Keeping it low lets the lowest point of the interior act as the outlet, so resin can drain out instead of pooling at the base.
Choosing the second hole
The second opening goes on a surface you select during design. Base the choice on two practical factors: a spot you can reach easily during cleaning, and a location that does not carry a detail you need to keep intact.
Placing the two openings on different surfaces gives the interior two separate exit paths, which is more useful than clustering both holes on the same wall.
Hole size and depth
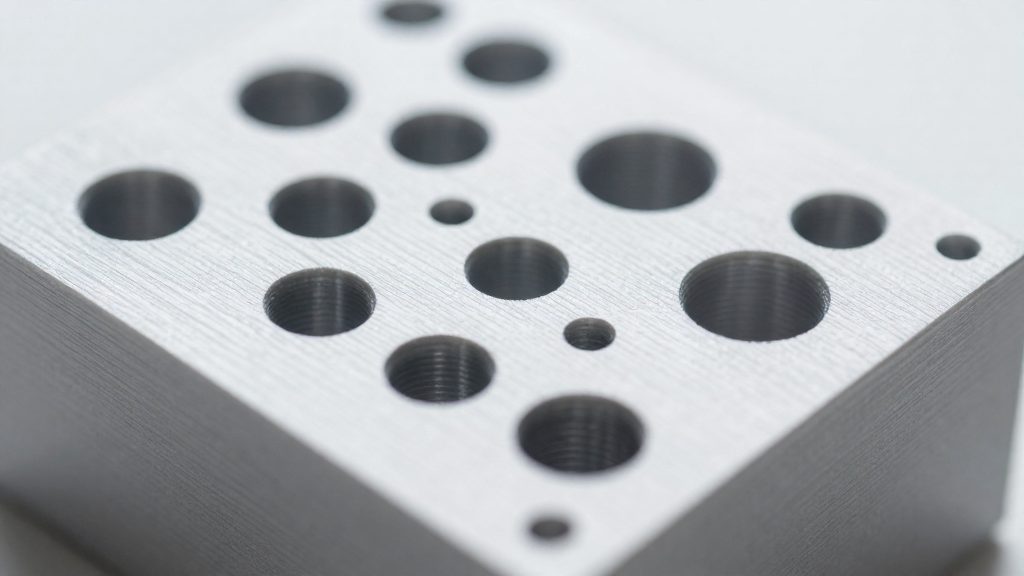
A drain hole only works if it opens into the cavity. The depth rule is that the hole depth must be greater than the wall thickness, so the hole reaches the hollow interior. If the hole stops short of the inside surface, it leaves a closed skin of resin over the cavity, and the trapped resin has no exit. Because the wall thickness sets the minimum depth, a thicker wall needs a deeper hole, and you should check the wall thickness at the spot where the hole will sit rather than assuming it is uniform across the model.
A hole that breaks completely through the shell is called a through hole. Formlabs’ guidance (2026) is that PreForm’s Automatic Depth Mode detects the depth needed for a through hole, so you do not have to measure the wall and type a value yourself. The mode works from the geometry of the model at the point where you place the hole, which keeps the depth matched to the local wall rather than to a single figure for the whole part.
A practical sequence for hollowed models:
- Place the drain hole on the surface in PreForm.
- Enable Automatic Depth Mode so the software calculates the depth for a through hole.
- Confirm in the preview that the hole runs from the outside surface into the hollow interior, not just into the wall.
- Repeat for each drain hole, since each location can have a different wall thickness.
A depth at or below the wall thickness means the hole does not reach the cavity, so it cannot drain. The hole then looks open on the outside but never connects to the cavity, so it does not let resin escape. Taking the depth from Automatic Depth Mode avoids this by aiming the hole through the full wall.
Avoiding cups and trapped resin
A cup is a concave area on a part’s surface that holds liquid resin when the part is lifted out of the vat. Hollow models are especially prone to this, because their shells can form cupped sections that keep resin inside the part. According to Formlabs (2026), PreForm can flag these areas before you print, and the geometry should be designed to avoid the shapes that trap resin most readily.
Finding cups in the Print Validation menu
PreForm includes a Print Validation menu with a Cups toggle that flags cupped areas on the model. Turn the toggle on after you import and position the part, then review every flagged region before you send the file to print. The Cups toggle exists so that these areas can be corrected before printing, which reduces the resin left inside a hollow shell.
Negative overhangs also trap resin
A negative overhang is an undercut or inward-curving surface where liquid can pool. Formlabs advises avoiding multiple negative overhangs on the same model, because each one can trap liquid resin in addition to any cups. Check the model for these shapes during design, not only after the PreForm check, since changing a feature later often means redoing the whole model.
Why hollow parts retain resin
The interior shape of the shell determines where resin collects. Reviewing the flagged regions and removing unnecessary undercuts reduces the amount of resin left behind after the print finishes.
Cleaning and curing hollow parts
A hollow print is cleaned from the inside as well as the outside, and the drain holes make that possible. According to Formlabs (2026), drain holes let isopropyl alcohol flow through the part during cleaning, so the solvent can move across the hollow interior and carry away uncured resin that would otherwise stay put.
The contrast matters. The alcohol bath cannot reach resin inside a sealed cavity, so the cavity can remain tacky even when the exterior looks finished.
| Condition | Isopropyl alcohol path | Uncured resin inside |
|---|---|---|
| Drain holes open | Flows through the interior | Can exit through the holes |
| Drain holes absent | No path through the interior | Stays trapped |
The workflow that follows from this:
- Check the holes before washing. Remove the model from the build platform and confirm that the drain holes are open, with no cured resin plugging them.
- Wash with the holes facing the flow. Immerse the part in isopropyl alcohol so the liquid can enter and leave through the openings, rather than sitting in a sealed bubble of resin.
- Remove the exterior residue. Rinse the outside once the interior has been cleared, so the surface is free of uncured resin before curing.
- Dry the part fully. Let the part dry after washing, with the drain holes clear, before moving to the UV stage.
- Cure after cleaning. Only cure once the interior has been flushed, because any resin still trapped inside will cure in place and be harder to remove later.
The drain holes are the only route for both liquids and resin in this workflow, so they need to stay clear from the moment the model leaves the printer until curing is complete.
When should you not hollow a model?
Do not hollow a model when its walls cannot carry the load it will face, when its geometry forms cups you cannot design out, or when the part needs solid material throughout. Hollowing replaces the interior with air, which saves resin but removes the internal material that gives a part its strength. The decision depends on how the part will be used and whether its shape traps resin.
Large parts whose thin walls cannot carry load
A large piece that bears force, such as a bracket, a handle, or a figure with an extended arm, puts that stress on a shell that may be too thin to take it. Thinner walls use less resin, but the saving comes at the cost of margin against failure. Before you hollow, identify the regions that will bear load and keep those areas solid or in a thicker shell.
Models with cups that cannot be redesigned away
If a cup-shaped cavity cannot be reshaped, hollowing is only viable when functional drain holes can be added (see the drain hole sections above); otherwise print the part solid. Without them, resin stays trapped inside the part. If you cannot add functional drain holes, print the part solid.
Parts that need full internal solid strength
Some parts depend on solid material throughout their interior, which a hollow build cannot provide. Hollowing removes that interior material entirely, so a part whose function relies on weight, a press-fit core, or a section that will be drilled or tapped is a poor candidate. Keep solid interior volume in any part where internal mass or material continuity matters to its use. Hollowing is best reserved for parts where the shell alone carries the load and the cavity can be drained.